
~~~~~~~~~~~~~~~~~~~~~~~~~~~~~~~~~~~~~~~~~~~~~~~~~~~~~~~~~~~
Hi guys! I'm so excited to be sharing one of my projects over with you all at Lish's blog... she has so many creative, fun projects and she's super-sweet so I'm just thrilled to be here today!


Anyways, that's me, Mel (as in Melissa), from The Crafty Scientist (that's my blog button too and you might remember me from the lovely intro post Lish did for her September sponsors). I'm a twenty something Southern girl working on my PhD in the sciences, pampering my puppies, teaching a course every semester, loving sports, and crafting and creating to keep myself sane in between! Over at my blog I like to share lots of pictures of the dogs...

(That's Max on the right and Bella on the left.) And I like to share my various projects... lots of wreaths, wall art, blogging tutorials, and jewelry, like these interchangeable ribbon and briolette necklaces...


- Paint chips
- Paper punch (1-inch circle)
- Cardstock
- Pencil
- X-acto knife
- Gluestick (that dries clear)
- Mod Podge and brush (I used the glossy stuff, but you could use the matte finish one)
- Picture frame (mine was from the Dollar Store!)
- A stencil of the letter you want (or a shape you want - you could do this with anything!)

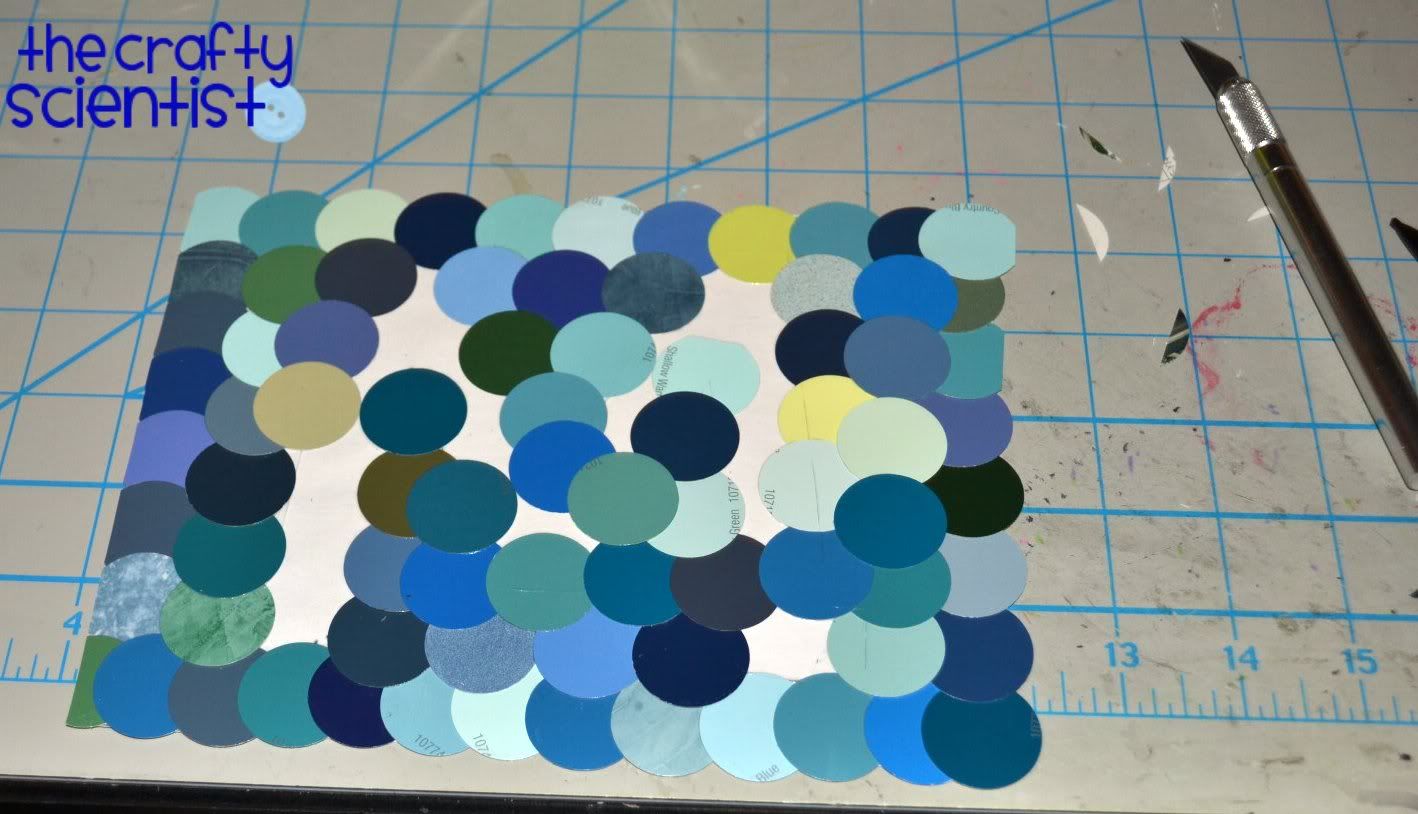
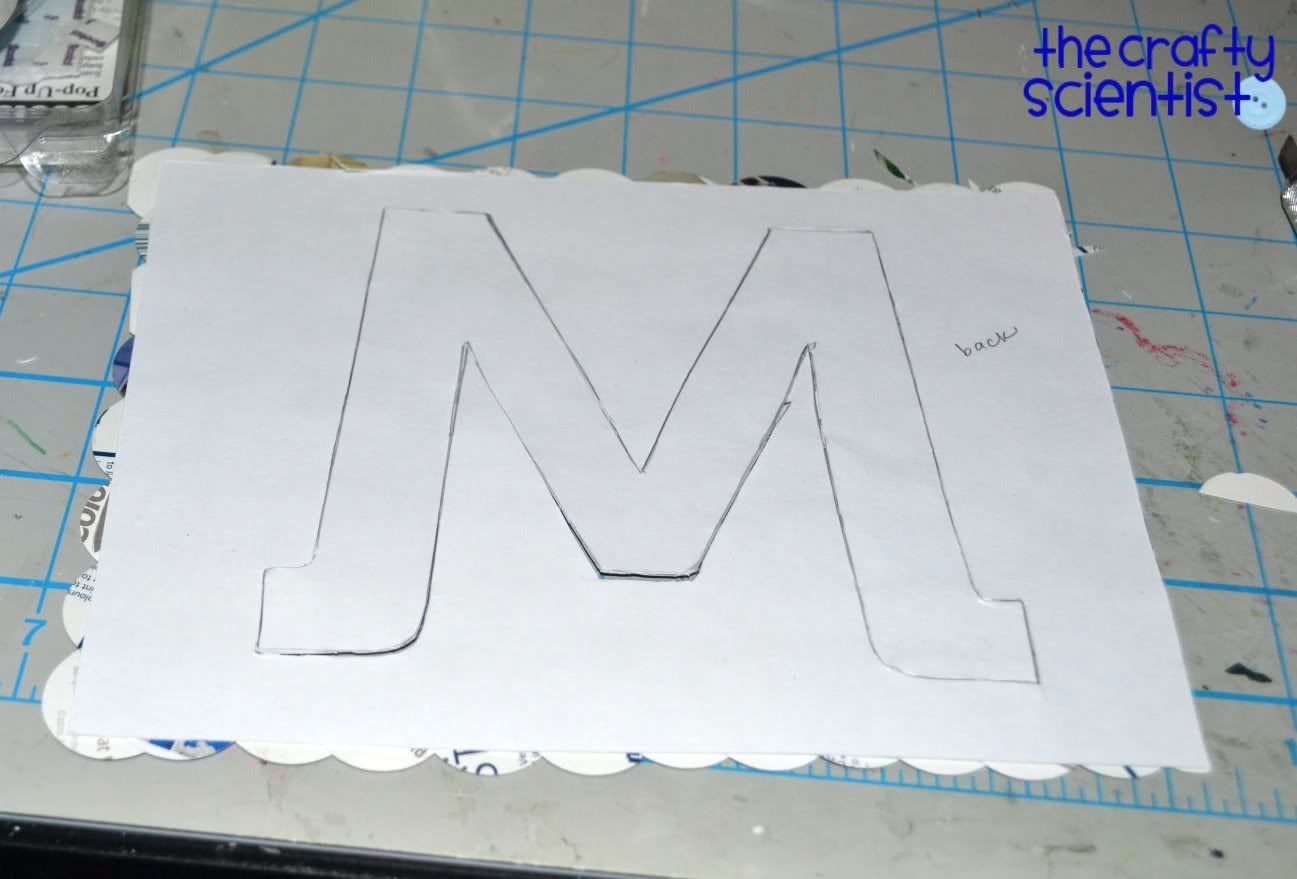
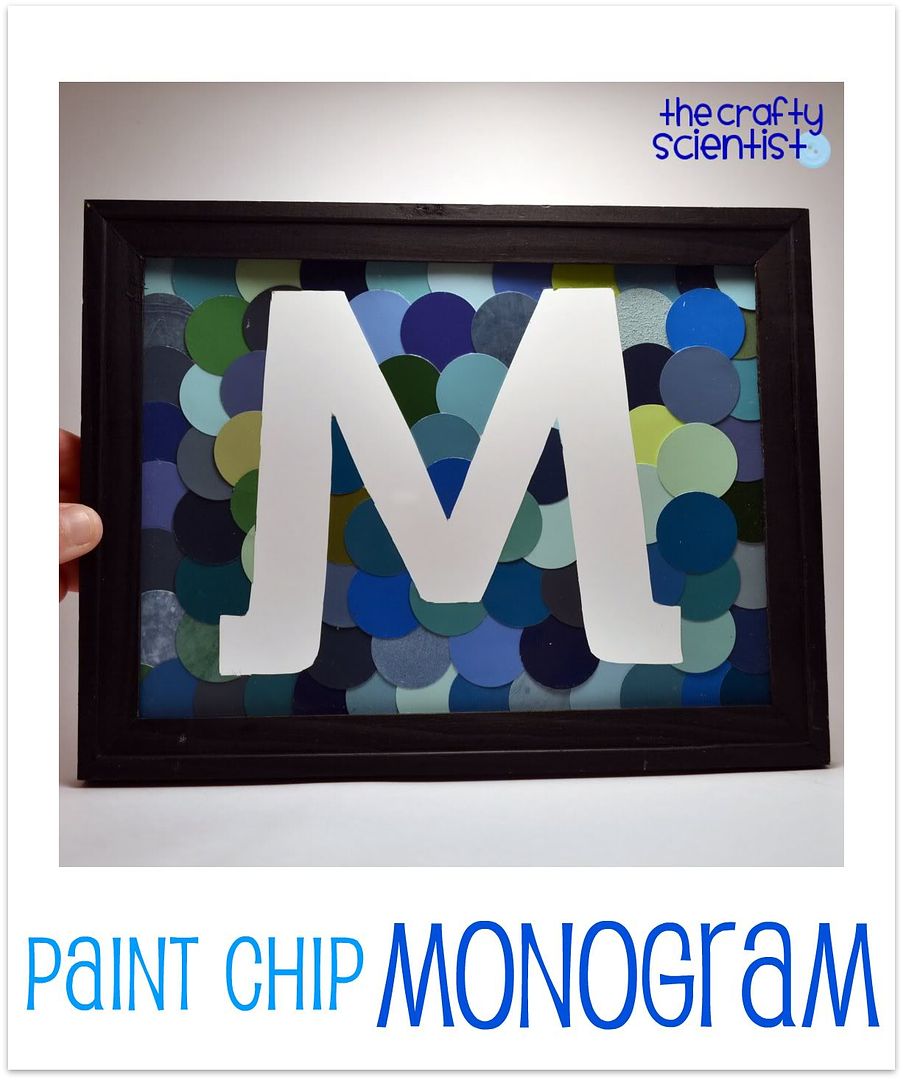
This is a lot like this basic paint chip art project I made first. Basically, the first thing you want to do is punch out a bunch of paint chip circles. You also want to cut your cardstock to fit your frame. I also traced my "M" onto both the front and the back of the cardstock (in the same place - basically you need the letter on the back so that you can cut the letter out and you want it on the front so you don't necessarily have to cover the area to be cut out with paint chips). Then you basically grab your gluestick and start pasting circles over the front of the cardstock up to and including the borders of your letter.
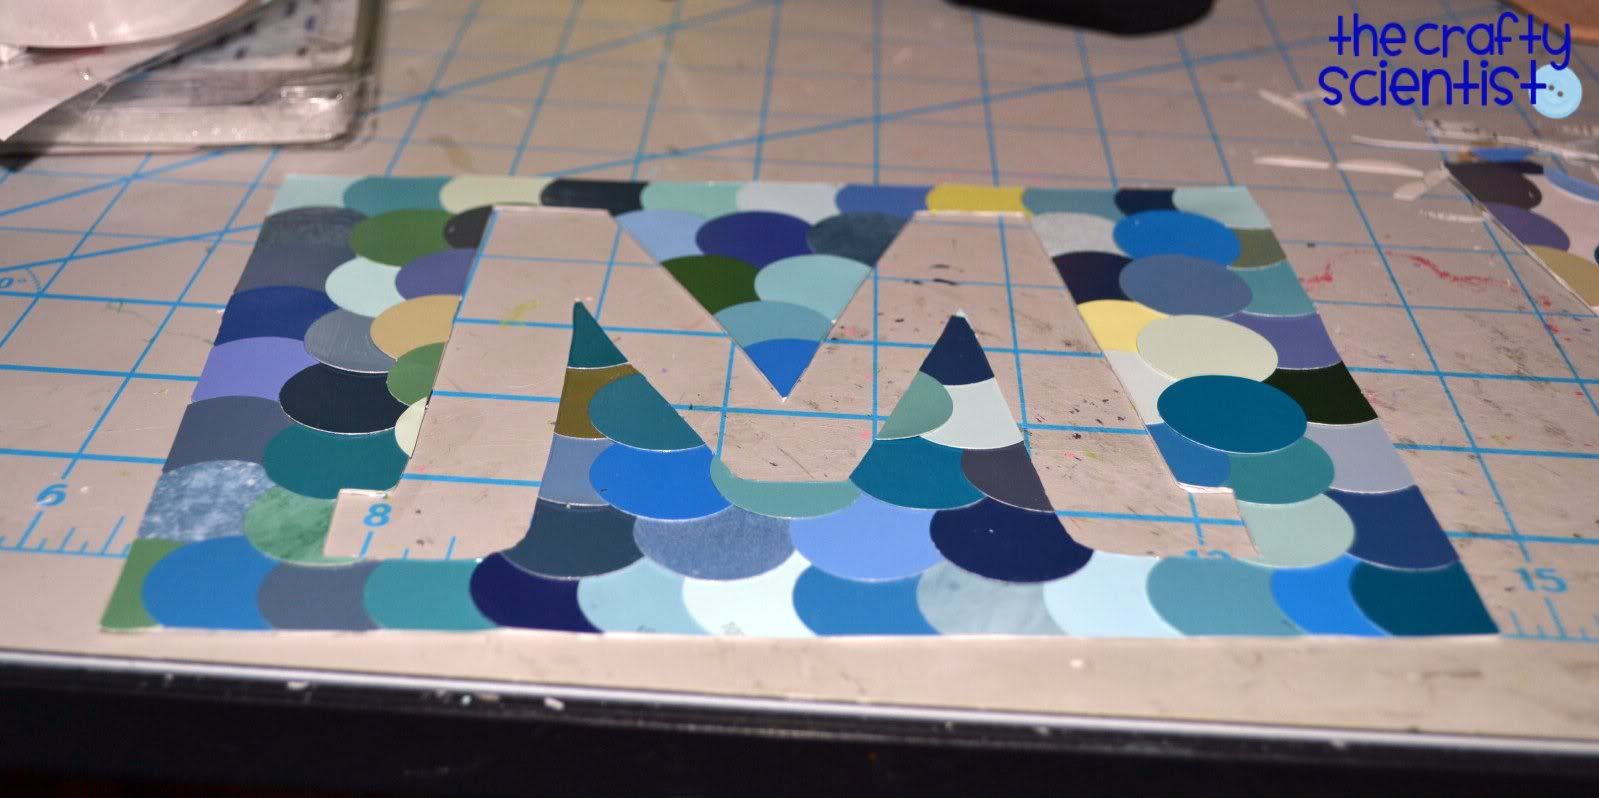
You can kind of see the outline of the "M" in that photo. After that, you want to use your X-acto knife to trim the edges so that your art fits into the frame. Basically, you want all the edges to look like that left edge in the photo above.
Then, you want to flip over your art and trim out the pattern. Then you want flip it back over and Mod Podge the whole front. I used glossy finish because I just like it.
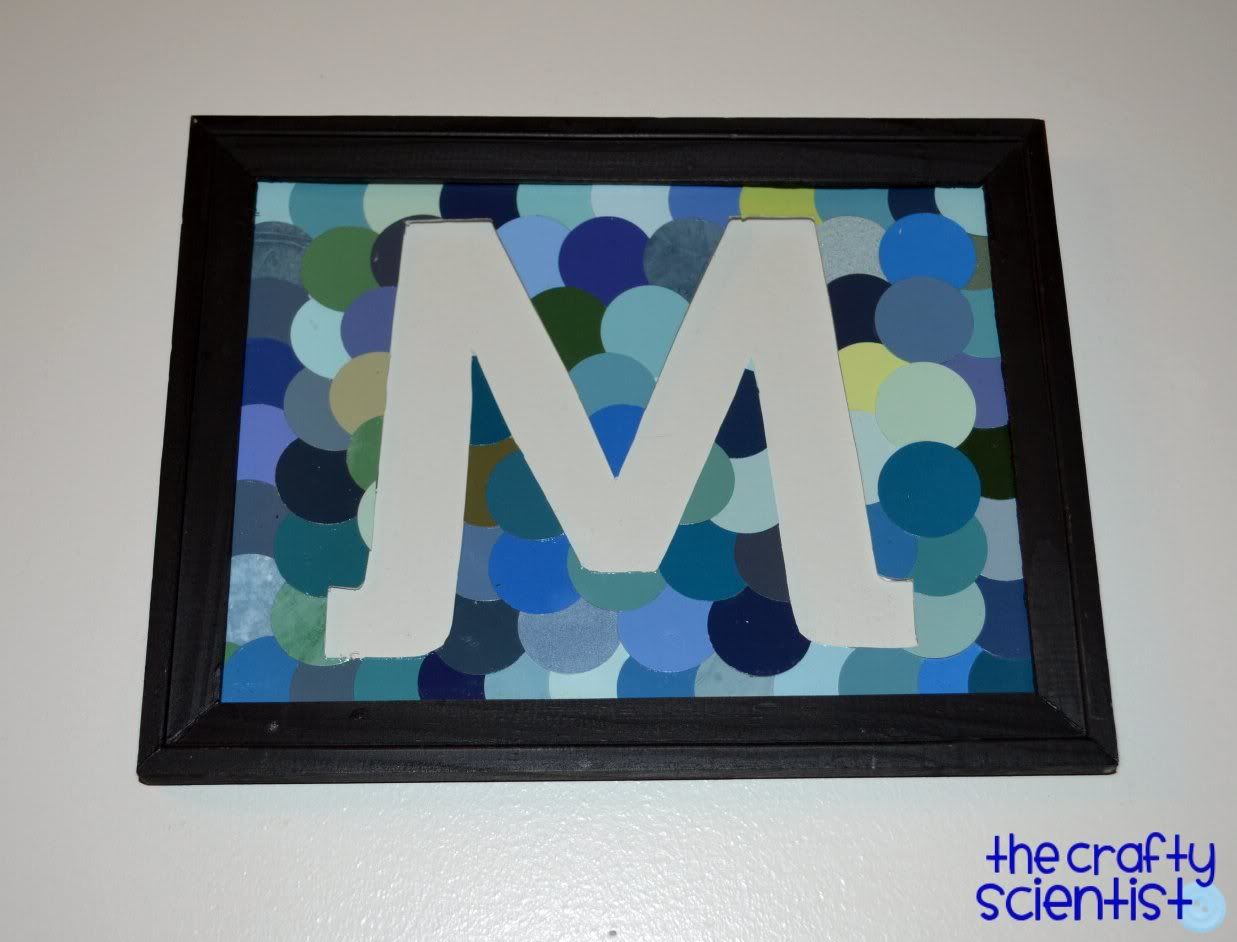
Now it's just a matter of framing your art! I wanted the frame to be "backless" - like in my July 4th Sparkly Blue Star Art project - and so I pasted this thing into the frame directly. Basically, I mostly used my gluestick to put some glue around the front edges of the project where it would be covered by the frame. However, there were still some little points that weren't laying flat so I dabbed a little bit more glue on those places...

And voila! New pretty wall art for almost no money!

Hope you enjoyed this fun little tutorial! I'd love it if you'd visit me at my blog, The Crafty Scientist, and a HUGE thanks to Lish for letting me guest post here today!

Thanks so much for posting Mel! I so enjoyed talking with you and having you guest post on my blog today :)

1 comment:
Cute! Thanks for linking to Things I've Done Thursday!
Melanie
bearrabbitbear.blogspot.com
Post a Comment