


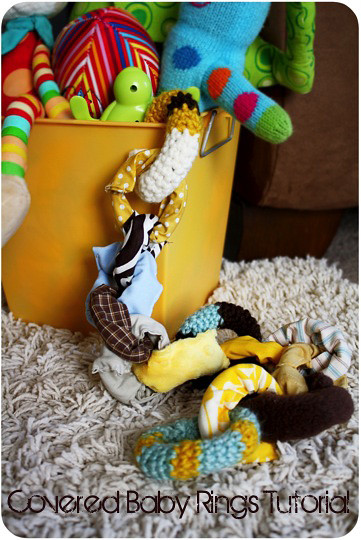
I remember doing these and thinking they were so cute! I need to do some for my new little one. The thing about these is it aids in letting little ones explore different textures, especially if you use all kinds of fabrics.

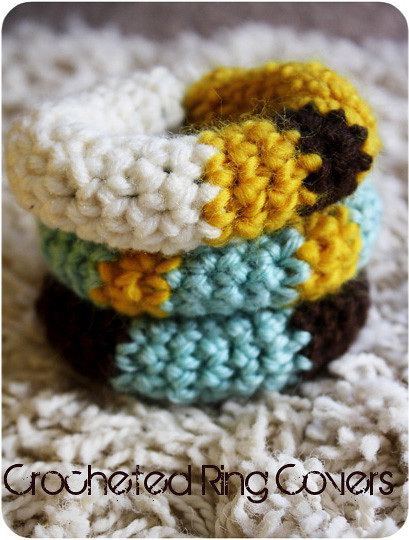
-Size G hook
-Medium Worsted Weight Yarn
-Yarn Needle
1. Ch 3, sl st in first ch to create ring
2. 3 sc in ring (3)
3. 2 sc in each sc in ring (6)
4. sc around until it is desired length
5. Do a few dec at end to pull it together, leave a tail once satisfied
6. Use needle to weave in tail and help gather the end if needed.
*Feel free to change the colors at any time you like. Simply use a sl st to do this. Have fun and be creative!
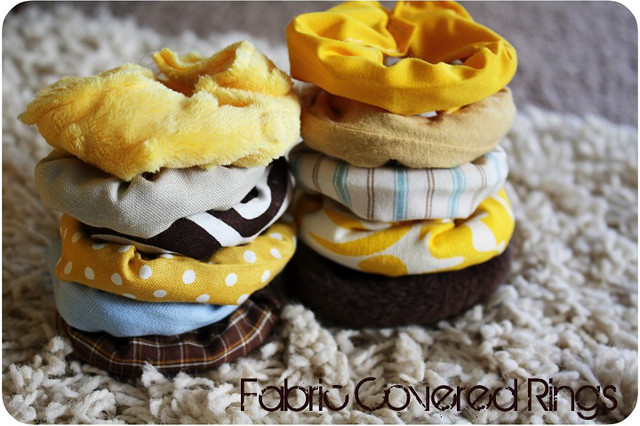
Again, make changes necessary for the size rings you are using. To make fabric covers you will need:
-Fabric (my pieces were 7x4.5 inches, but you can make them longer if you want it to look more scrunched)
-Needle
-Thread
-Scissors
-Iron
-Sewing Maching

1. Take rectangular piece of fabric, fold in half wrong sides facing, and iron.
2. Open up and fold ends in on each side, wrong sides facing, and iron.
3. Take one long edge and fold it towards center crease made in number 1, wrong sides facing. Repeat for other side.
4. Fold the whole thing in half again (at original crease made in number 1) and there will be no raw edges showing.
5. Sew down the long side where it is open and down on short end.
6. Slip the casing onto the ring and hand sew the opening shut.
And that's it! Have fun creating a handmade holiday! And thank you Lish for having me :)
Oh, your so very welcome Jessica! Thank YOU for sharing this awesome tutorial!! I know that I have a ton of rings laying around and it would be so much fun to pick out coordinating fabrics! Great gift idea!!

Tomorrow is 'Around the House Day', with fabulous posts on outdoor decor ideas, decorating tips around the house, holiday traditions and more!

No comments:
Post a Comment