

I am not sure on the source for this photo, sorry!
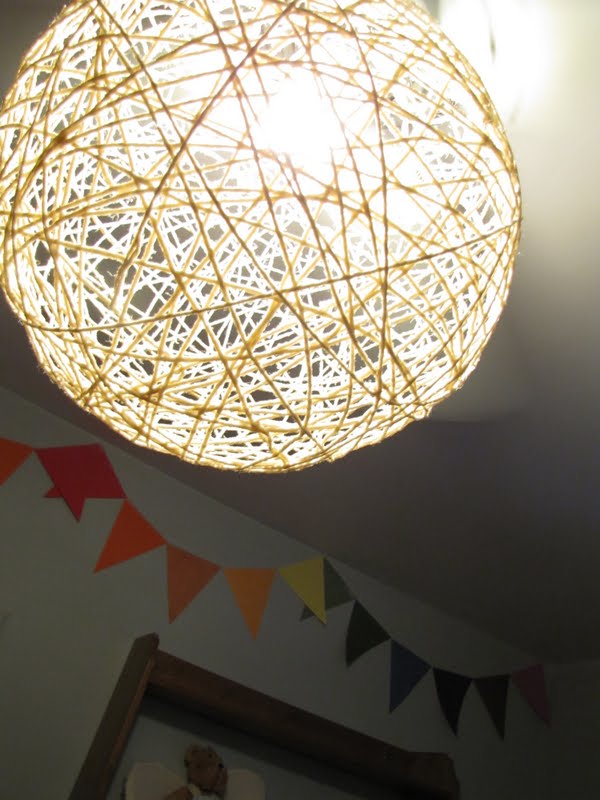
I love the look of the light fixture in the photo above, but I am pretty sure it would cost me over 3 months of morgage payments! Then I saw this idea over here at Pickles and it has been on my craft list ever since. There are not many ceiling fixtures in our old house and the ones we do have are ceiling fans. One of those ceiling fans is in Gray's room and thought I was out of luck at trying to do anything somewhat cool to it, because the fan is very practical on hot summer days! But then I saw this over at House Tweaking- and immediately thought of the yarn light off my craft to do list- so I combined the two ideas into one!
DIY Yarn Light
What you'll need:
A medium sized beach ball- I found one at Walmart for $3.95
Base to sit the ball on- I used a small bowl
Vaseline
Ball of Yarn
Large bowl
2 bottles of white glue
1 cup of corn starch
1/2 cup of water
Lots of newspaper
Clear spray paint/adhesive

1. Put down lots of newspaper or a tarp-it gets very messy!Set the ball on top of a small bowl. I used this as a guideline for the opening where the light bulb would hang. Coat the ball in Vaseline so the yarn doesn't stick to the ball.
2. Mix together the glue, water and cornstarch in a large bowl. I originally made half the recipe and then had to make more halfway through. You may have to alter the recipe depending on the size of ball and how much yarn you want to use. Just make sure the mixture is on the thicker side.
3. Coat the yarn in the glue mixture. As a side note- I ended up with clumps and knots of yarn so many times that I was swearing and not having much fun! If I were to do this again, I would only put a few feet of yarn in the bowl at a time and maybe use a spoon to drag over top of the yarn to remove the excess. Or better yet, enroll a friend so you can make an assembly line!

4. I started with wrapping yarn around the bottom of the ball/top of bowl and then went up and down from there. All of the tutorials I read said to start vertically and then end with wrapping around the ball. I just wrapped and moved the yarn around until it looked right. Because I ended up with so many knots, I actually had to cut the yarn and start again. I just made sure to secure all the ends by wrapping the end underneath other pieces of yarn. This is where the photos ended, as it got toooo messy!

6. Hang the ball outside and spray with clear spray paint. Again, step back and admire your magnificent handywork!

7. To hang from ceiling fan, I removed the original light casing and tied 3 pieces of wire to the screws that held in the light. I attached the wires to the yarn light and voila! Again, step back and admire your magnificent handywork!


Linking up over here:


8 comments:
Beautiful! What a fun tweak to lighting! Thanks so much for sharing this!
such a great idea!! i absolutely love that you put it on the ceiling fan light.
Oh my goodness, I haven't seen one of these before and it looks amazing! I am thinking, patio embellishments. Thank you for sharing, this is going on my list now!! :)
Glad to be your newest follower,
Adrianne
happyhourprojects.blogspot.com
that looks so great! i love how the light filters through the strands! thanks so much for linking this up to my tip-toe thru tuesday party! hope to see you again this week! also am your newest follower!
Thank you guys!
You've been featured at Happy Hour! Feel free to grab a featured project button and thank you for linking up!
Adrianne
happyhourprojects.blogspot.com
Really? That light fixture was made of yarn? Amazing! It sounds so easy to do and all I have to do is to equip myself with a lot of patience. I will make lots of it but in different sizes!
-Allison Shallenberger
I love the look of the light fixture in the photo above, but I am pretty sure ... hlightfixturesceiling.blogspot.com
Post a Comment