


Showing posts with label diy. Show all posts
Showing posts with label diy. Show all posts
Friday, December 12, 2014
The Stockings Were Hung...Recycled Sweater {DIY} Stockings

Monday, July 29, 2013
Pirate Birthday Party for a 4 Year Old
Welcome to Grayson's Pirate Birthday Party...he turned 4 in June, but hey, better late then never, right?!

Sunday, June 16, 2013
My New Chair
For months (a year?) I've had this boardroom-ish chair sitting in our basement, waiting for an overhaul. I'm not sure what drew me too this chair to begin with, maybe it's simple lines and mix of modern and retro, it reminded me of the chairs that would sit in the office in elementary school...not sure if that's a good memeory or not, haha...
None the less, it caught my attention and I had big plans for it....

None the less, it caught my attention and I had big plans for it....
Monday, March 25, 2013
DIY Egg Carton Flowers {Spring Craft for Kids}

Yes, Egg Carton Flowers-this one is an oldie but goodie! With two 4 year olds and two 2 year olds hanging off my legs on Friday morning, I knew a craft was in order! This was the perfect thing to brighten up a dreary morning...
To make these you'll need...
Empty Egg Cartons
Paint
Paint Brushes
Newspaper or drop cloth {or not}
Pipe Cleaners
Scissors

What next?
Separate each individual egg holder from the egg carton by ripping along the seams. Trim off excess carton as you go along.
Let the painting begin!
Once dry, I made a small slit in the bottom of each egg holder/flower, and popped a pipe cleaner through, making a few twists and knots so that it wouldn't slip back through.
Sit back and admire your pretty bouquet of flowers!


Have you and the kiddos made anything fun and messy lately?!
Happy Monday!
linking up with Lolly Jane, The Gunny Sack, Fluster Buster, 52 Mantels, Live Laugh Rowe, I Gotta Create, Embracing Change



Thursday, March 7, 2013
Loves on a Thursday-Homemade Coconut Scrub

I'm itching for warm weather, an uncomfortable need fresh air that doesn't knock the wind out of you itching. So in my attempts at inducing Spring I've been working at getting my feet ready for flip flops-yes, a little far fetched but whatever, I can do what I want...hehe...
There are a bazillion recipes out there for body scrubs, but I thought I'd share mine with you anyways. You can basically add any ingrediant as long as you keep the base of the recipe the same-1 cup or sugar and 1/3 cup of oil. I'm a sucker for anything that has coconut in it, so what-dya know I made a Coconut Brown Sugar Scrub.

What you'll need...
1 cup sugar
1/3 cup coconut oil
2 tablespoons corn syrup
1/3 cup shredded coconut

To use, just grab about a tablespoon in the palm of your hand and rub onto moistened feet or elbows, wherever you need a little TLC. I even like it on my hands, although it may be too rough for someone with sensitive skin.
Some other alternatives to the coconut would be, epsom salts or a combination of sugars, raw, brown or white. Try adding cinnamon or vanilla, maybe a zest of lemon or lime?! I've also made this with olive oil too!

Some other scrubs and DIY lotions I'd love to try...
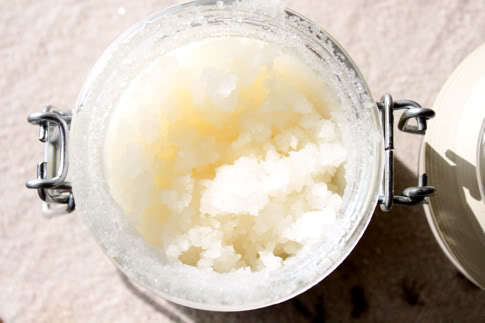


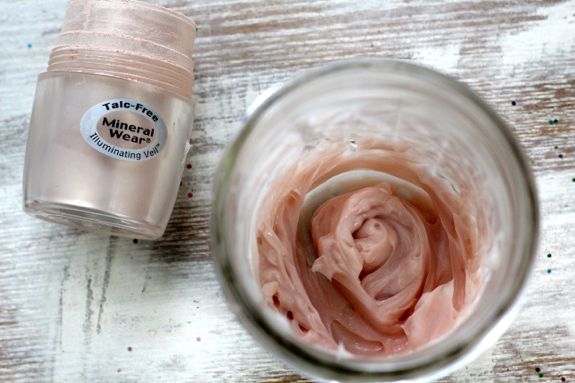

Yes, there's really bubblegum in this lip scrub!!!
And my apologies...I have not even made it around to check out all your loves from last week :( But don't worry I'll get there!!!!! Thanks for linking up with us!
And my apologies...I have not even made it around to check out all your loves from last week :( But don't worry I'll get there!!!!! Thanks for linking up with us!
Are you a Pinner? Etsy stalker? Blog hopper? Photographer? Have cute kids? Loving life? Always looking for pretty things? I would love to see what your loving lately!
Grab a button and link up your pretty finds!

PRIOR TO LINKING UP
Colleen and I would love for you follow us :) If you could provide a link back or display our button in your post, we would love that! And please credit the original source when using other's projects and photographs!
Colleen and I would love for you follow us :) If you could provide a link back or display our button in your post, we would love that! And please credit the original source when using other's projects and photographs!
linking up with Westover Manor, The Artsy Girl Connection, Live Laugh Rowe, 52 Mantels, I Gotta Create, Lolly Jane
Tuesday, December 4, 2012
Easy Peasy Hanging Ornament Display

I've been all about the super easy projects lately. And when I happened upon this vintage frame at a craft sale, I snatched it up!! I had no idea where it would end up but knew it wouldn't go to waste...
I love the intricate details on the frame and the color was perfect just the way it was, so all I did was give it a little wipe down and it was ready to rock n' roll! I'll probably use it in various ways throughout the year, and since the holiday season was here, I decided it needed a little bit of bling!
The hanging wire that was on the back was in rough shape so I cut it off and strung a very thin wire a little over 3/4 of the height of the frame opening.
I finished it off with a small collection of ornaments in a variety of colors that coordinate with my holiday decor...and tada! A pretty little statement piece on the side table in our living room!


You could easily do this with any old frame, big or small!
Linking up with Crayon Freckles, Funky Polkadot Giraffe, 52 Mantels, Live Laugh Rowe, I Gotta Create, Happy Hour Projects, Blissful & Domestic, Alderberry Hill, Mercy Ink, A Night Owl Blog, Tatertots & Jello, The Kurtz Corner, Homework, Happy Hour Projects

Monday, October 8, 2012
Turquoise Fall Mantel {with Painted Pumpkins}

So far this long weekend, we've enjoyed a fabulous turkey dinner with all the fixin's and lots of family time...next on the list is a corn maze and pumpkin picking later on today...
Right now though, I wanted to share our Fall Mantel with you...
I was inspired by these painted pumpkins which were part of my 7 Fabulous Pumpkins Collection a few weeks back. As much as I loved the pinks that they used, it didn't really work with our color scheme...what I came up with was a mix of blues, turquoises and gold that fit perfectly with the rest of our decor and isn't your typical fall color scheme...

It was a nice afternoon project for my 3 year old too...he loved it, only was a bit disappointed that I wouldn't let me paint the pumpkins red {his favorite color}...hehe... the sparkles were a bit of a nightmare and we had them everywhere, but it gives the navy pumpkin a nice touch...


For this little plague, I was dying to try this DIY Chalkboard Paint from A Beautiful Mess, but I put a gold metallic spin on it...I love how it turned out! And it will be so pretty at Christmas time too...


What do you think? Do you like my Turquoise Inspired Fall Mantel? Have you done any fall decor color schemes that were outside the box?

Also linking up with, Crayon Freckles, Ginger Snap Crafts, Uncommonly Yours, The Artsy Girl Connection, 52 Mantels, I Gotta Create, Live. Laugh. Rowe

Tuesday, September 25, 2012
DIY Coat Rack Revamp

Remember the Coat Rack from this post?
Originally, I thought of using it in the toy room (painted yellow) to hang the boys' costumes and hats on...BUT then I found myself needing a rack or something to display my scarves on in a local salon, so I started brainstorming and this is what I came up with...
First, I removed the hooks and soaked then in combination of CLR and water {cause who knows what was on them last!!} and then gave the stand a good wash and scrub followed by a light sanding {I hate a long drawn out projects and knew that I wanted a distressed finish, so I wasn't really following any How To's on how to properly finish furniture {So if you have a really nice piece of furniture you want to refinish-please don't follow my instrutions!}


Next I painted the rack with two coats of white paint.While I waited for that to dry, I washed and rinsed the hooks and then I sprayed them with two coats of Black spray paint.

The next day, I gave the whole rack a light sanding to rough up the edges for a rustic and worn look.


And voila...here it is in action!!!

A pretty little stand to show off some of my accessories at Glow Hair Studio!!
Linking up with...Homework, Funky Polkadot Giraffe, Vintage Wanna Bee, Live Laugh Rowe, 52 Mantels, I Gotta Create, The 36th Avenue, Happy Hour Projects, Tatertots & Jello, Create & Inspire
Subscribe to:
Posts (Atom)